To be able to follow this Quick Start Installation Tutorial the PC host must be configured first to obtain the IP Address from the EDIMAX AR-7084A device. Click here to see on how-to Do-It-Yourself.
After obtaining the PC host IP Address from EDIMAX AR-7084A ADSL Modem Router, open any web browser to begin the Quick Start Installation Guide.
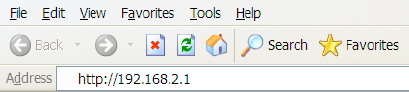
Enter the router’s default IP address: “192.168.2.1” into your PC’s web browser and press “enter”.
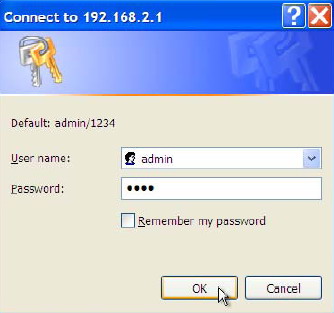
The login window/screen will prompt or appear. Enter the “User Name” and “Password” then click “OK” to login. The default User name is “admin” and the Password is “1234”,
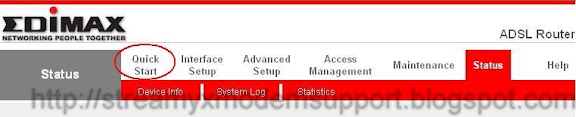
Successfully login to the EDIMAX AR-7084A Fast Ethernet ADSL Modem Router will appear the main page as you can see below picture. Please click “Quick Start” to begin the setup of the Internet connection.
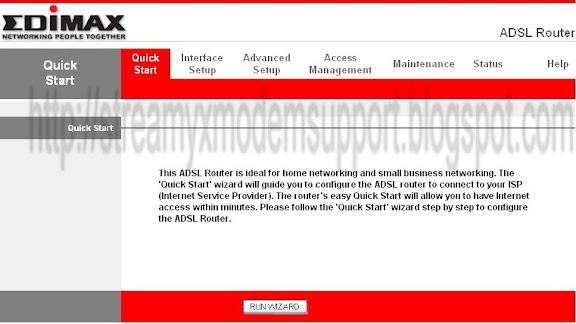
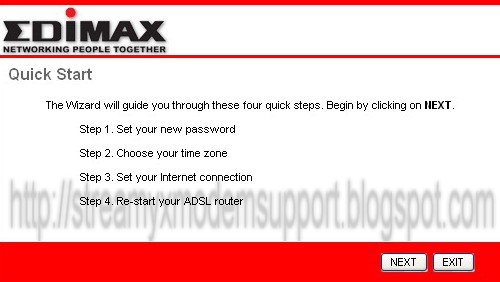
Step 1. In the Quick Start menu, click “Run Wizard” to start the configuration.
Please follow the four steps in the setup wizard. Begin by clicking “Next”.
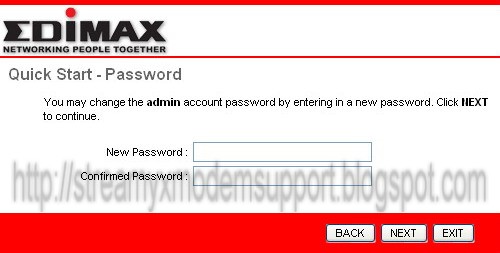
Step 2. Please enter the router’s new password and confirm the new password again.
If you wish to keep the router’s default password, enter ‘1234’ and confirm ‘1234’.Click “Next”.
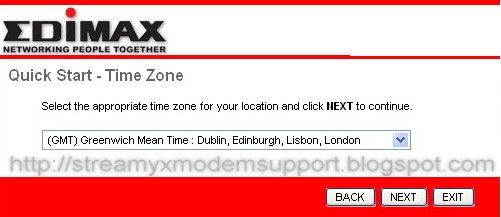
Step 3. Please select the time zone where you are located. Click “Next”.
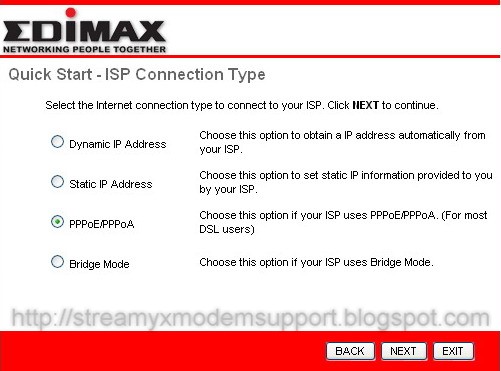
Please select your ISP’s Connection Type .
For Streamyx DSL Broadband Internet Connection please choose PPPoE/PPPoA.
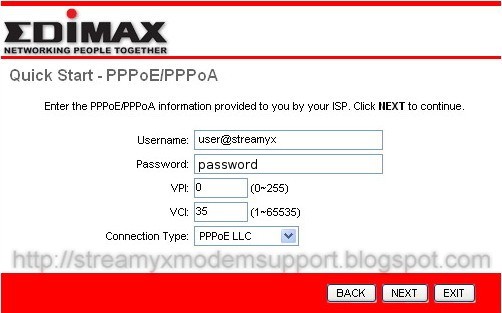
Step 4. Input the data supplied by your ISP, that is Log In ID/Username and Password.
If you are not sure about the connection type, please contact your ISP. The TM Streamyx hotline is 100 and for other telco's may dial 1300-888-123 wrong connection type will prevent you from connecting to the Internet.
The following is an example to setup Dynamic IP Address with VPI, VCI and Connection Type as follows:
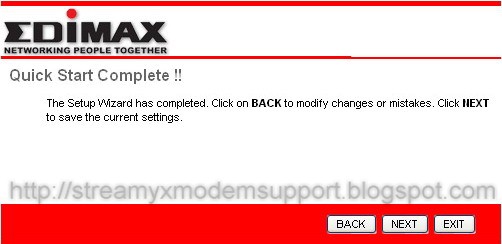
Step 5. Click “Next” to save the settings and please wait for the router to restart.
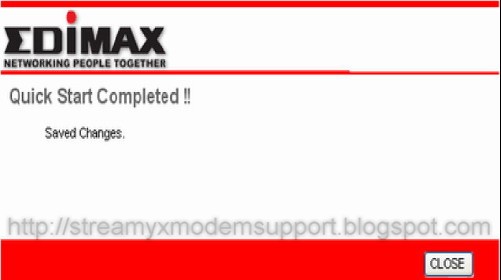
Quick Start Completed, please click “Close” when changes have been saved successfully and the Internet will be connected.
Click here to see the Internet Connection Status.
0 comments:
Post a Comment