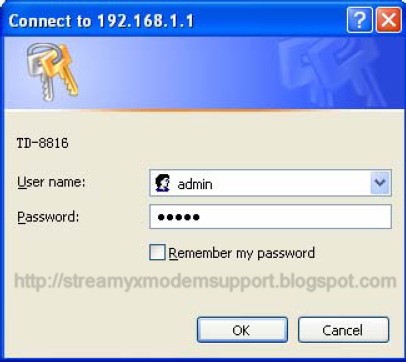
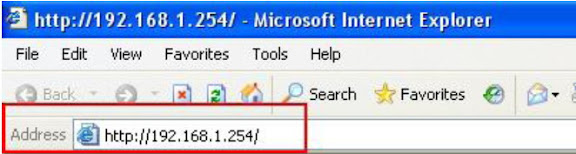
Once your host PC is properly configured, please proceed as follows to use the Graphical User Interface (GUI) Web-based Utility: Start, open any of your web browser and type the private IP address of the BiPAC 5200 Series ADSL2+ Modem/Bridge/Router, which by default is 192.168.1.254 in the URL field and click “Go”, a user name and password window prompt will appear.
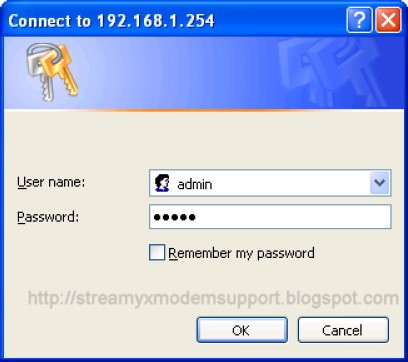
After that, you will be prompted with new window or screen as shown below, enter the default User Name admin and the default Password admin, and then click OK to access to the Quick Start screen. You can follow the steps below to complete the Quick Start.
Note:
If you can not Log In the BiPAC 5200 Series ADSL2+ Router learned how-to do-it-yourself troubleshooting this device, click here.
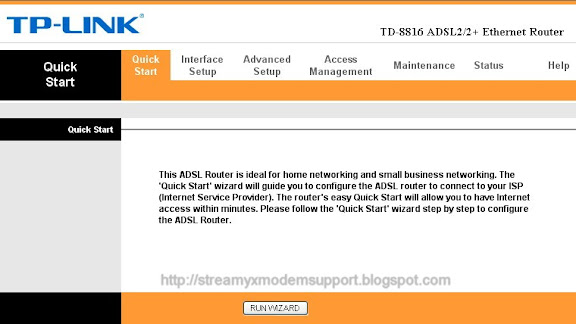
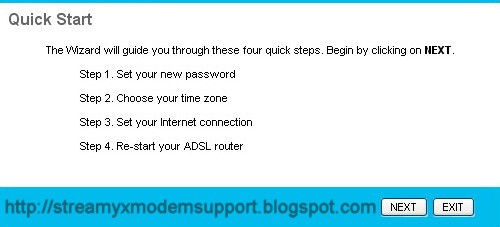
Congratulation! You are now successfully logon to the BiPAC 5200 Series ADSL2+ Router!
Step 1: Select the Quick Start tab, then click RUN WIZARD, and you will see the next screen.

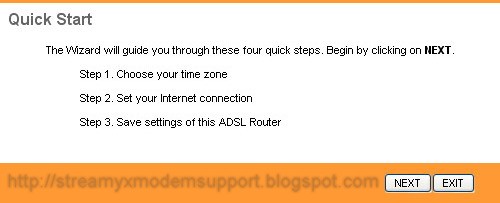
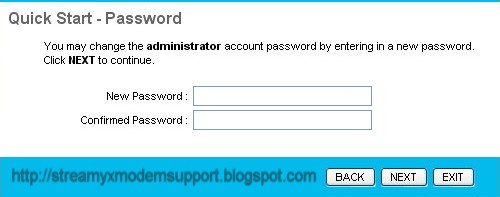
Click the NEXT button.
Click NEXT to continue.
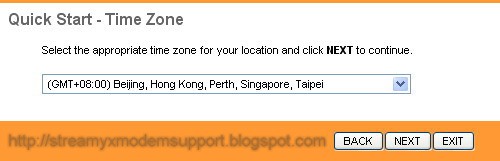
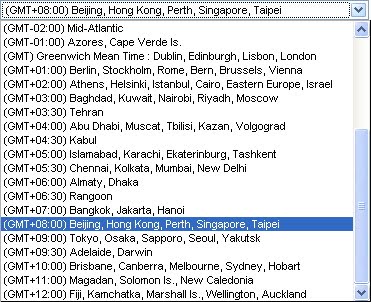
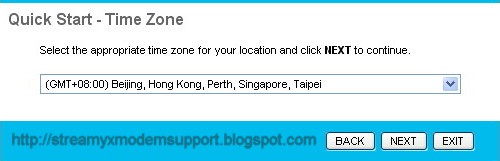
Step 2: Configure the time for the Router, and then click the NEXT button.
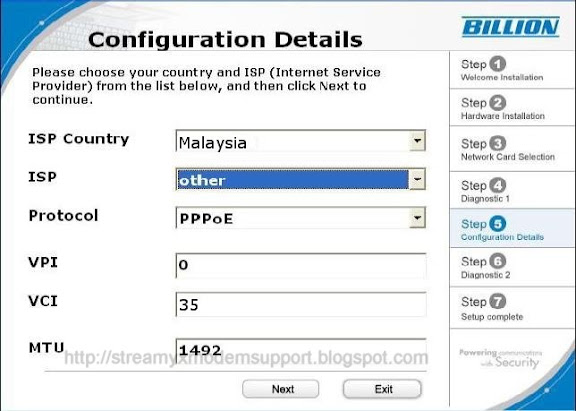
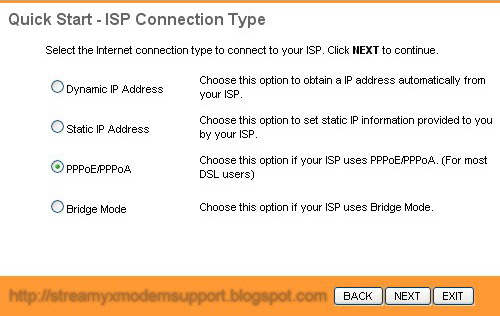
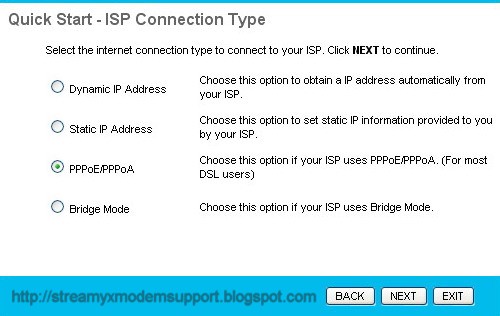
Step 3: Select the connection type to connect to the ISP (We select PPPoE/PPPoA mode for example here), and then click the NEXT button.
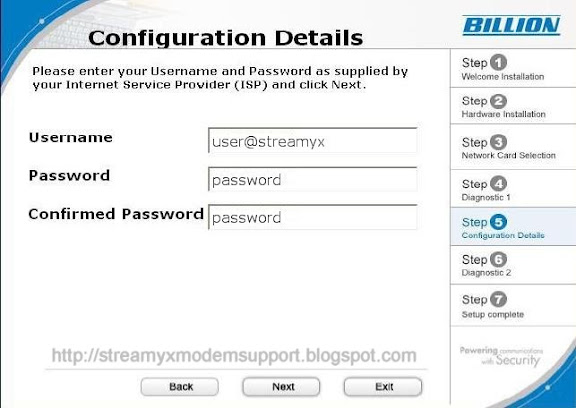
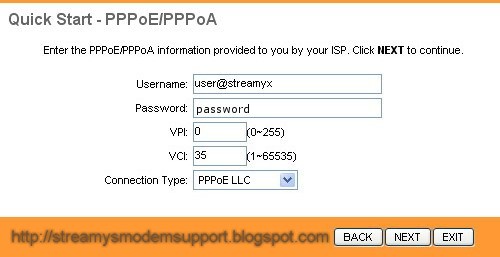
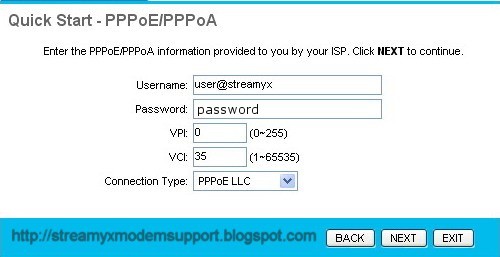
Step 4: Configure the following options provided by your ISP: Username, Password, VPI, VCI and Connection Type. Then click Next.
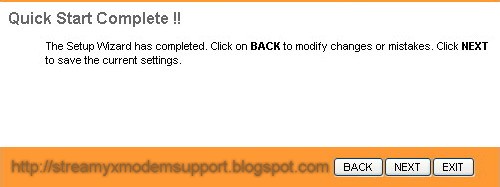
Step 5: Click NEXT to finish the Quick Start.
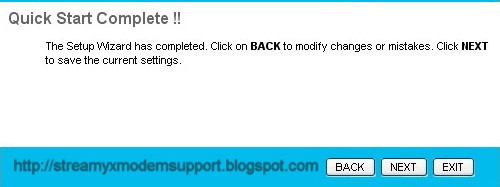
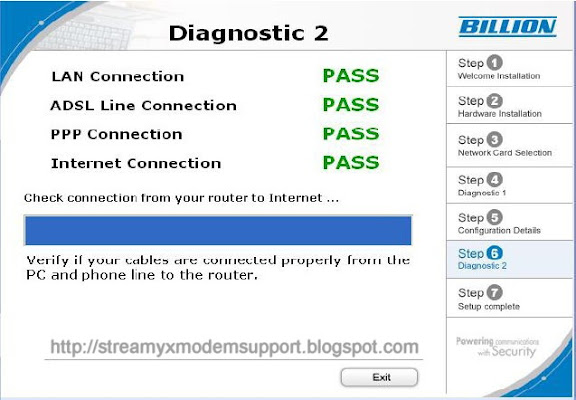
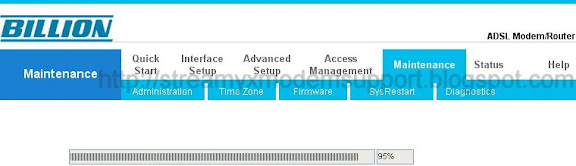
Step 6. Quick Start Completed and Saved Changes, Click Close and Restart the Router

For any question about Streamyx DSL Broadband Internet Connection you can call TM (Telekom Malaysia) just dial 100 by using your landline phone and speak to their Customer/Technical Support Representative they are very helpful regarding any issue.
For other network telco's (mobile phone) dial 1300-888-123 or email at help@tm.com.my
Feel FREE to post your comments, suggestions or any questions regarding any issues about Streamyx DSL Broadband Internet Connection, Modem and Router and also wireless networking I can assure you to reply your post.